
Hi my crafty friends
Niki Chill here.
I'm excited to bring you my very first Blog as one of the new Design Team Members for Craft On The Run.

Its my very first time on a Design Team and I'm ready to get down and get crafty.
I'd love for you to follow me and together we will have some fun making new and exciting things along the way.
So, this month I'm am working with the gorgeous papers from Simple Stories - Vintage Farmhouse Garden and our challenge was to show you how papers can be used for both a masculine or a feminine layout its all in the way you use them.
Please check out my Simple Vintage Farmhouse Garden Folio in my next Blog to see the Recipe Folio I've created keeping a feminine look.
But for now let me show you my Simple Vintage Farmhouse Garden, masculine creation.
When I saw the animals featured on the papers I immediately thought of our farmer friend in Victoria named BJ.
The most hard working, caring and hilarious farmer there ever was.
A Cattle farmer who looks after his herd and farm during the day and then next minute will be helping deliver calves in the middle of the night.
He takes on orphan sheep with his beautiful wife Kellie, hand rears orphaned calves; they even help koalas in the heat of summer and at times his living room looks like an animal creche come orphanage.
Along with his 3 gorgeous King Charles Cavaliers, his 3 Kelpies, 11 pet sheep and 1 crazy pig, I just had to pay homage to this farmer.

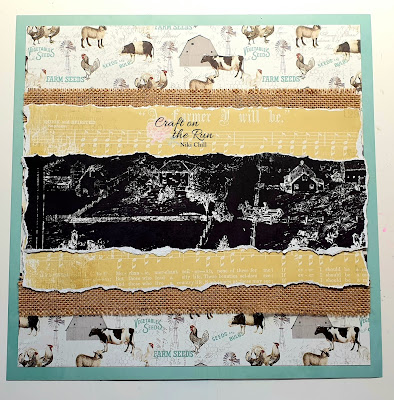
1. For this layout; choose a background coloured cardstock and cut a square out of the middle leaving you a 1 inch frame and then a 10 inch square - put the square aside to cut you photo mats from.
2. Cut 'Market Days' sheet - 3/4 from top and from the bottom. Stick down centred onto cardstock.
3. Cut 2 stripes of hessian 11 1/4 x 1 1/4, fray edges.
Stick one piece down 2 3/4inches from the top of page and the other 2 inches from the bottom of page.
4. Then cut 2 strips 11 1/4 x 2 1/2 of 'Seed Packet Elements', distress edges.
Stick one piece 3 1/4 inches from the top of page and the 2nd piece 2 3/4 inches from the bottom of page overlapping the hessian.
5. Cut a 11 1/4 x 3 1/2 wide strip from the 'On the farm' sheet and distress edges, stick down overlapping the 2 above strips so its centred.
That's the paper cutting all done.
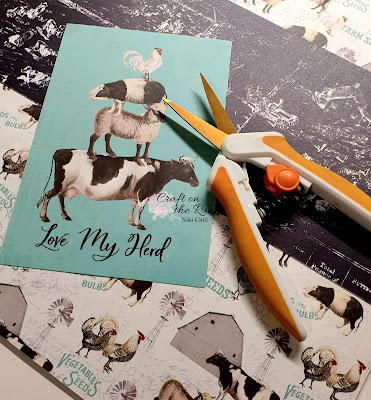
6. Fussy cut the stacked Pig, sheep and cow from the 'Love My Herd' panel and the farmhouse from the extra panel.
7. If you have one - Die cut a Windmill and fencing. If not create a fence look using brown coloured strips and make your own.
8. Colour the larger frame from the Dusty Attic Scribble Frames Small
9. Stick down farmhouse cut out centred along the bottom edge of the "on The Farm" black strip.
10. Then if you have your fencing, stick that over the top of the farmhouse slightly underneath so it looks to be in the foreground.
11. Place your chipboard frame centred on the page.

12. Stick you windmill on top of the chipboard frame to the right hand side.
13. Stick you fussy cut cow, sheep and pig to the left on top of the frame.
you will need to pop some dimensional behind so that it sits up high.

14. Now, mat your photos using cardstock in a contrasting colour - here I used black.
Then using the left over 10 inch square from the inside of the frame
you cut earlier form a double mat on your photo.

15. Arrange your photos around the page spaced out evenly and stick down on page
Note: Your photo's may overhang over the layers of paper and hessian at the top on the two photos above, so stick some dimensional underneath on the top edge.
The reverse for the bottom 2 photos, the bottom edge will overhang and sit up slightly; place dimensional there too.

16. I cut a shadowed phrase "Love My Herd" on my Cricut that was originally on the panel we fussy cut the stack of animals from.
Place title centred at the top of page between the 2 top photos.


That completes our layout, I hope I've inspired you.
Until next time.
Niki xx


😍 stunning
ReplyDeleteThankyou so much Robyn x
Delete