Tuesday 29 December 2020

Blessed

Hi all,

Today I am sharing my second layout using the Vintage Artistry Wedgewood collection from 49 Market. 

Dream


Hi all,

I have been working with the Vintage Artistry Wedgewood collection from 49 Market. Another beautiful collection. I particularly liked that all the elements were already pre-cut and just needed to be popped out from the page.  

The blue patterns and elements really stuck out to me so that's where I started. I choose the Sublime Wedgewood paper for some contrast against the blue as my back ground page. I trimmed roughly a quarter of an inch off each side and added the Breeze Wedgewood as a border behind after gutting the inner side.

I added some extra detail onto the background page using a flourish stencil and some blue ink. From here I began adding my layers. I distressed the edges and inked them with the same blue ink I used on the background and added dimensional adhesive foam tape to create depth.

Check out the close up photos below.


Tuesday 1 December 2020

Feeling Jolly Cyber Crop Winners

WOW its December already??? I think its time for a rest? Well what a busy November we have had.... 
Our first big cyber crop with 7 challenges and also our 1st Birthday.

We would love to take the opportunity to thank those who have supported every aspect of the store and its growth, whether you have come in to the store for a crop, a class, brought products online or in store, participated in our challenges, cyber crops, commented on peoples work in our community page.... 

We sincerely thank you, there isnt enough words to tell you how much we appreciate all of you.


Today we are here to announce the Feeling Jolly Cyber Crop winners.

Sketch Challenge 


Moodboard Challenge 


Card Challenge 


Pick a Present Challenge


Ingredient Challenge


Christmas Traditions Challenge


Blind Crop Challenge


And last but not least - Queen of the Crop 
To win this category you needed to enter all of the challenges by the due date.


Debra Beer

Congratulations to all the winners and to everyone who entered your work is amazing and we appreciate your support throughout the year.


Saturday 28 November 2020

Mystic Prophecy


 Mystic Prophecy


Hi Everyone, Rachel here!

Today I'm sharing 3 different cards featuring Mystic Prophecy card collection by 3 Quarter Designs. Each example shows different ways you can use the paper pack from adding their chip board included in the pack to fussy cutting the designed paper. Hopefully this will give you some ideas to create some magical cards. Oh and if you are a purple lover, this kit is perfect for you. 

Featured on this card:

3 Quarter Designs ~ Mystic Prophecy card collection 

Foam Squares

Double sided tape roll

Kaisercraft ~ Purple Rhinestone strip

 Distress Inks

Glossy Accents

 You can find all these goodies at Craft on the Run.


Lets take a look at the pack. Here you can see there is many different papers to pick from.

Including chipboards and featured pictures for fussy cutting.

One of the cards I used the chip board as the main feature and dabbed on some Distress Inks. Using the colour's Wilted Violet and Hickory Smoke.

Once the distress Inks where dry I covered the chipboard with Glossy Accents to create shine.

To finish off this card I scattered some purple rhinestones around and inked around the sentiment with Hickory Smoke.

For this card I decide to ink around each item with Hickory Smoke that I cut out. You will see in the last card I haven't inked around the edges, you can then see the difference. This one has soft edges while the last has crisp white edges.

The sentiment has been placed on foam squares to create depth.

A little bling to once again finish off the card.

The last card has a lot of Fussy cutting, but well worth it. Each piece was also popped onto some Foam squares to help create layers.

Can you see the difference with the crisp white edges? It can totally change the look you are going for.

All finished, which one is your favourite?


Happy card making friends... 


It’s a fill my cart kind of day!

https://www.craftontherun.net 

Friday 20 November 2020

Bloom - Feature Product

 Morning how are you? Did you survive another week? I hear you and I am looking forward to getting creative this weekend hopefully my mojo is still around.

 Dont forget you have till this Midnight to enter your work from the Feeling Jolly Cyber Crop.


How do you feel about the Feature Product week? Is there a collection you would like to see and have been afraid of using? Let me know in the comments or via Facebook or in the Craft on the Run Chit Chat Group.


Ok so you have all this fussy cutting and now what? How do you use it to create a layout from scratch. 

So its time to get your messy on and have some fun with a little bit of mixed media.
Use a stencil and add texture paste to the middle of the page. Let it dry and then the fun stuff starts.... adding colour.

You can use anything my favourite thing is Lindys Stamp Gang Magicals and like they say the are magical. Just add water and see what they can do.


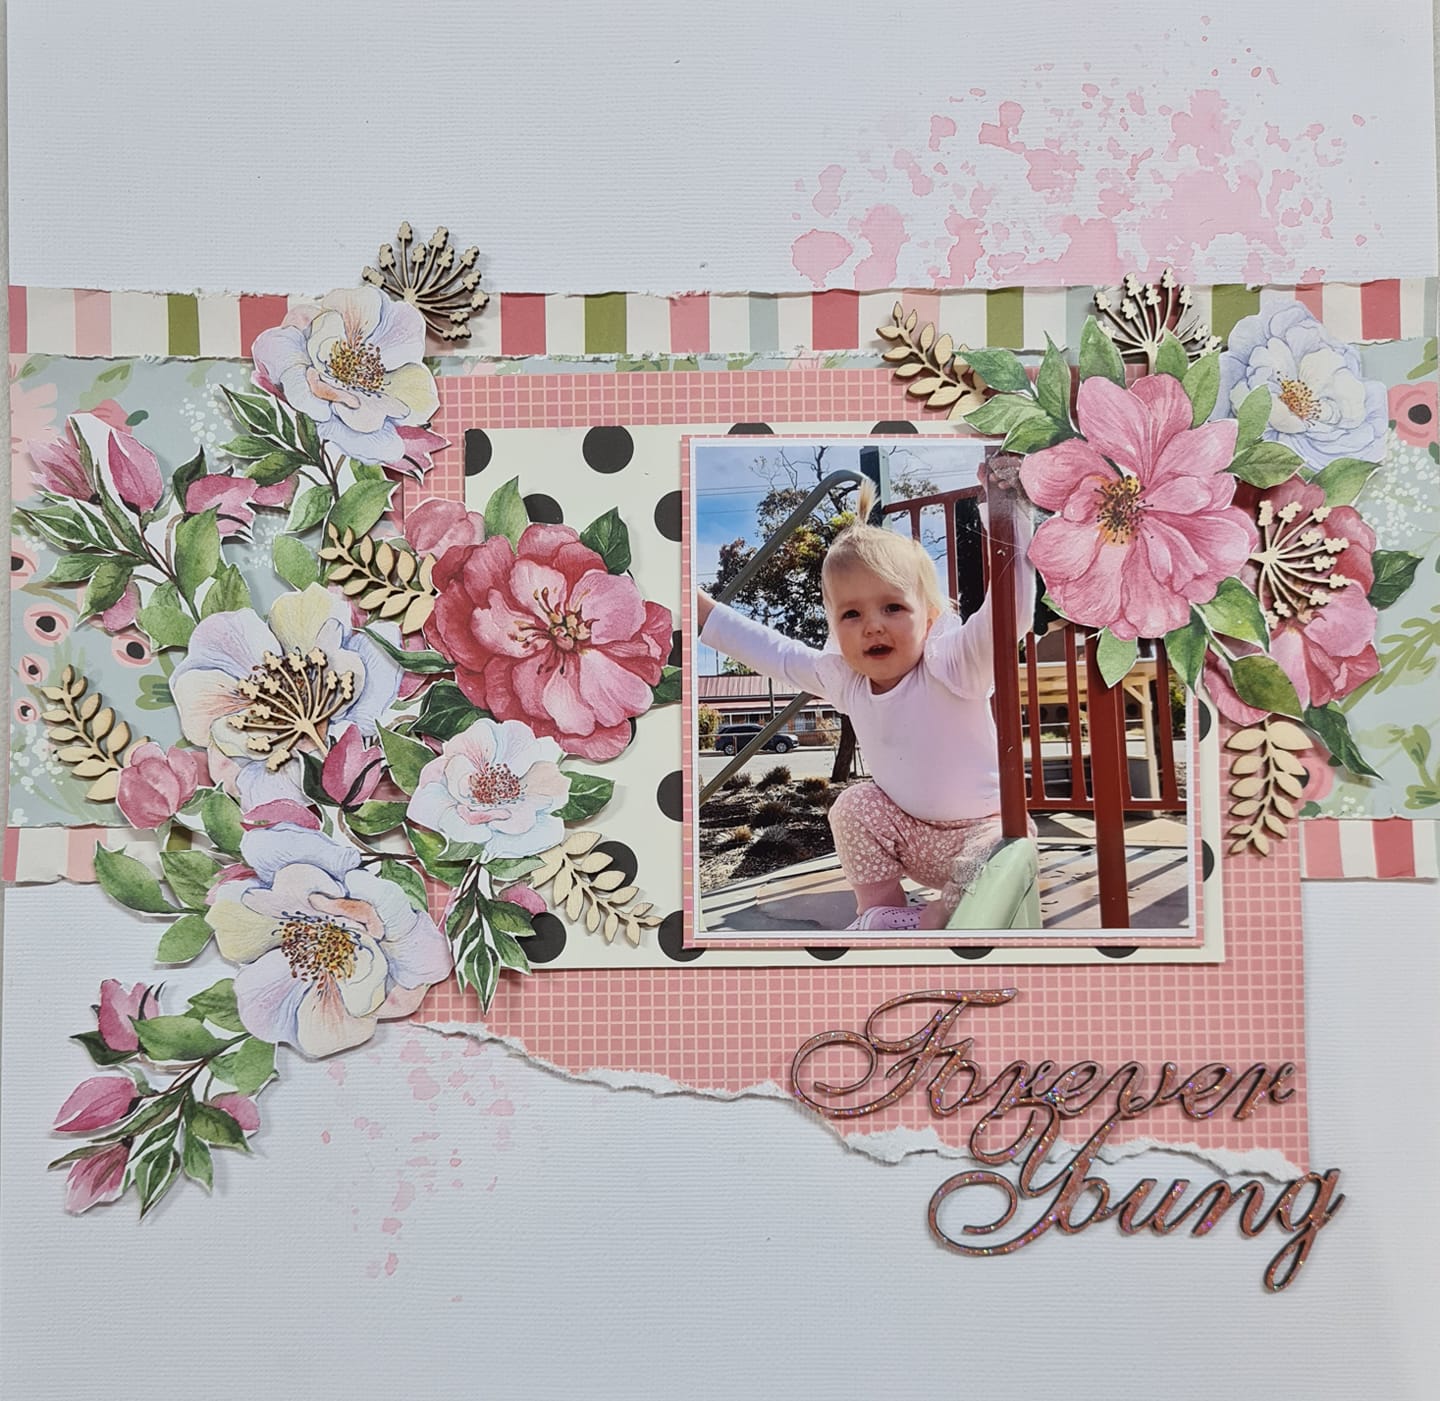
Once your happy with your colour then let it dry if your in a hurry you can use a heat gun but remember to alternate from front of the layout to the back of the layout so the paper fibers will shrink at the same rate and reduce the amount of warping.


Now to start the construction I used a compass and created a circle this is where all your fussy cutting will go around to give you a shape and a form for your layout.

Yes its that simple..... from there its about clustering flowers around this form I started on the right hand side with a large flower cluster and then I mimic the same on the top left hand side so you get some balance.

Then its about blending them out with smaller flowers and objects.... 


Notice that I didnt continue the circle down the bottom left hand side..... you could continue the circle but I dont want to waste any of the paper when I am adding a large Dusty Attic Title there.


Now the rhinestones there are are random placement but if you struggle with that grab a handful and drop them around the circle where they land is where they get stuck. 


OUT OF THE BLUE PAPER


Magicals


Till next time, have a creative day.
Rikki G
xxxx

Wednesday 18 November 2020

Be Yourself - Feature Product

Good morning, I hope this post is finding you well and your finding some creative time along the way.

I am here today to share another layout using the amazing Uniquely Creative Something Blue Collection - IN STORE NOW


Something you like to do is deconstruct wood grain pieces of paper, cut on the lines remembering to keep it in order....

Use a distress tool and do the edges (still keeping them in order)... then set them aside.

Grab a piece of cardstock and this is where you will start to stick down the strips, in between the wood grain  I used a small strips of True Blue paper or alternatively you could just stick straight onto it , but I love getting the most out of my paper because it can make another layout.


Now it becomes about the fussy cutting, have them cut in advanced and stuck in snap lock bags when you need them.


Pull out the sewing machine run stitches around the outer edge and do it multiple times so you get a big impacts this will allow you to rip and pull back your distressed edges more.


When trying to make something layered for boy pages the flourishes and leaves are great alternatives instead of flowers, the advantage is you still get a big impact with a masculine twist.

Also if you cut out one page you will have plenty of left overs for other layouts.


 Finish off the layout with a splatter of black ink, work diagonally so it draws your eye over the page. It also adds to the distressed look.


I will be back on Friday to share another layout using this collection. 

*** Note all these layouts are created with the one kit not extras need.

Till next time have a creative day
Rikki G
xxxxx