
Hi Crafters!
How amazing is the Design Team?! I am super pumped and feeling very Inspired by some of the creations this month, and I certainly hope you are feeling that way too!
In keeping with the theme of featuring Uniquely Creative this month, I've used one of my favourite dies from the Advent Calendar in the December 21 Release!
Today I'm going to show you how I put this little fun layout together!
So lets get started....

Starting off you want to take the 'Uniquely Creative Stacked Star' Die and make a heap of star cut outs just as I've done below (approx. 7-8 stacks), For my stars I've used the Choose your Own Adventure - Journey paper.

Once your stars are cut out go ahead and place them to one side while we get your base done.
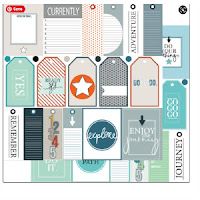
Next you want to take a piece True North - Adventure Awaits and a piece of your Choose your Own Adventure - Journey.
The Journey Paper will be your base, and the star side of the adventure awaits your going to rip apart just like I've done here...

It's just about creating pockets to show the Journey paper coming through.
Once your happy with your tears go ahead and adhere them down to the Journey Paper
(As shown in picture below)

Using some of the collectables and fussy cut elements from the Choose your Own Adventure Collection Create a couple little clusters both in the top Right Hand Corner and bottom Left Hand Corner. Adhere down using foam mount tape to create height.
(As shown in the pictures below)


Take some of the outlines from your pre cut stars and you want to make a collection of stars and adhere them at both the top Left Hand Corner and bottom Right Hand corner of your center strip of your Adventure Awaits paper.
(See picture below for reference)


Pop the page aside and lets make a cute little tag holder using a TEA BAG!
Take your empty Tea Bag and using just a strong double sided tape and a foam mount tape you want to create a little cluster of ephemera on top of the bag.
(Try not to use glue as this will seep through the bag and then it will stick together there for losing the ability for it to hold a tag)
Find a Tag, the skinny tags from the Choose your own Adventure - Currently Awesome page are the perfect size to fit inside the teabag.


Next step is to take your photo - I have used a 4"x6" inch photo with a white boarder and you want to adhere that towards the top of the middle center strip of your Adventure Awaits paper.
Take your tea bag pocket you've just created and adhere that slightly over the bottom right hand corner of your photo.


Taking Some more of your stars that you've already cut out and you want to place them around the top left of your photo just like I've done in the below picture, mix it up use some of just the outlines some of the stars in full.

Again using some more of your stars, go ahead and place some more around your tea pocket as well as a nice large title from the ephemera.


Once you've adhered everything down where you want it, the next step is to splatter your page with some ink, both white or black would absolutely work but here I've chosen to do white. Make sure to cover your photo and use a paintbrush as it makes it a lot easier to get a lovely splatter.

Finish off your layout by adding some ribbon onto your tag and adding any other little ephemera around your layout!

There you have it a beautiful starry night look layout is complete!

Thank you so much for following along and hopefully I've inspired you to create this little number as well.
Follow the links below to find the product used in todays layout.


Once again thank you for stopping by and taking the time to read the blog...
Until next time... Remember Crafting is cheaper than therapy!
- Crystal xx

Don't forget to follow us...

No comments:
Post a Comment