
Hello it's Jacquie here with another blogpost for Stamperia month.
I am working with the Amazonia Jaguar collection by Stamperia.
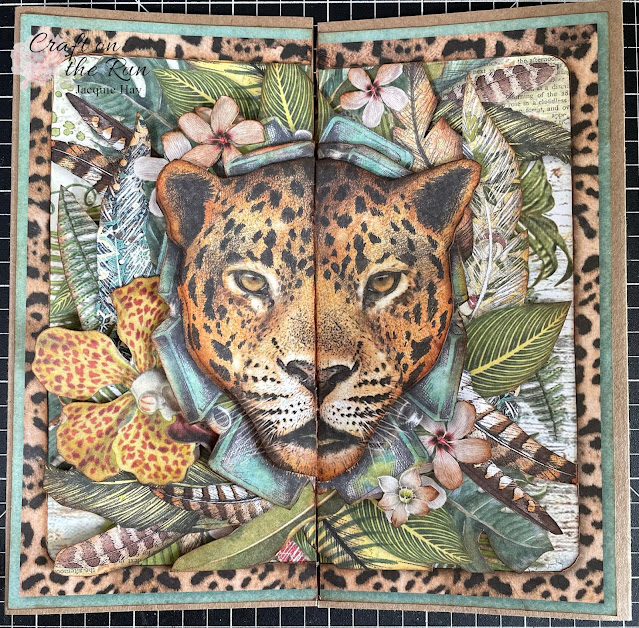
Step 1
First I took a couple of sheets of SBB768 and fussy cut the Jaguar and layered it up with foam tape and inked the edges using Tim Holtz Vintage Photo Distress Ink.


Step 2
I then cut a piece of Kraft Cardstock to 6" x 7", cut it in half and scored the edges 1/2" from the edge.
Next I cut the layered Jaguar in half and attached to the Kraft cardstock to create a door.
The next step was to trim a piece of SBB763 to 11 3/4" and ink the edge with Vintage photo distress ink.
Step 3
I fussy cut the Jaguar image out of the centre as per the photo below. Next I turned the rest of the paper over and glued it to a piece of Kraft cardstock as per the photo below.


Step 4
Next I cut a piece of Kraft cardstock to 8 1/4" x 11 1/2" and attached to the left hand side of the layout.

Step 5
Attach the large fussy cut Jaguar over the Kraft Cardstock as per the photo below.

Step 6
Next I attached the door I made earlier over the Jaguar's face. I opened the doors and attached a piece of SBB768 patterned paper and then a matted photo of my cat Philosopher.


Step 7
I punched a couple of holes and tied a piece of string to hold the door closed.
Lastly I added a Chipboard Title and a Geo Tribal Arrow by Dusty Attic which I coloured with a black Sharpie pen.
My layout is now complete. I hope you enjoyed this tutorial.


Bye for now and keep crafty!

No comments:
Post a Comment