Hi everyone. Jacquie Hay here with a new DT post for Craft on the Run.
We all love Mintay Papers but often they are so stunning that sometimes we don't know what to do with them, so the Craft on the Run Design Team is here to help with how you approach these collections so you have the confidence to use these papers.
As an added bonus and to encourage you to play along and give these tutorials a go we are doing a Mintay Giveaway...
Create a project based on any of the tutorials and share in the group/album telling us which tutorial you used and you go in the draw to win some stunning Mintay Papers.
Your creations must be based on the Design Team tutorials. And you must use any Mintay Collections
What do you think?
Want to give it a go?
If you are ready to share follow the link below and add your creation in the album.
I'm still using the Mintay Lady Collection to make a scrapbook layout.
The first thing I did was to choose papers for my layout.
I then gutted the centre of a sheet of white cardstock - leaving a one-inch border, so I can use the centre to mat my photo later.
I chose a floral pattern (MT-LAD-04) for my background and trimmed it to 11.75". I then sponged the edges using Tim Holtz Vintage Photo Distress Ink, and attached it to the white cardstock border.
Next, I tore a piece of MT-LAD-01 approximately 6" x 12", inked the edges, and placed it across the centre of my layout.
I then stitched around edge of the layout, using green embroidery thread.
Next, using the centre of the white cardstock I saved earlier, I cut some leaves using Uniquely Creative's Mixed Leaves Die
Next, I used a gloss spray - Dina Wakley's Fir Gloss Spray - in a couple of places where I intended to put my embellishment clusters.
I then fussy-cut some flowers and leaves from patterned paper - MT-LAD-03.
The next step was to mat my smaller landscape photo , which measured 3" x 4".
I attached a 4" x 6" landscape photo to the right of the layout with double-sided tape, and attached the 3" x 4" landscape photo to the left using foam tape.
Next, after inking the flowers I fussy-cut previously with Vintage Photo Distress Ink, I attached them using foam tape.
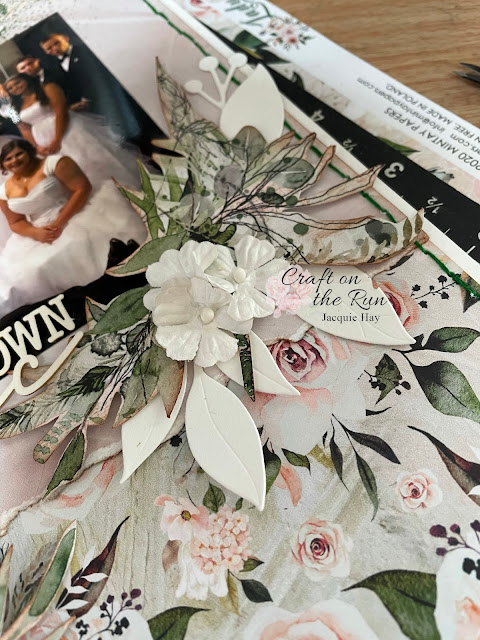
I added some Uniquely Creative White Flowers and the leaves which I cut earlier. The next step was to add a title from Uniquely Creative's Tranquility Laser Cuts.
My layout was now complete!
Here are some close-up photos, so you can get a better idea of the textures and layers.
The images below are linked to their product pages in the Craft on the Run online shop:
Uniquely Creative's Mixed Leaves Die
Stay tuned for more tutorials throughout the month, and don't forget to try a tutorial and share with us to have a chance to win some Mintay goodies for yourself!
Till next time, have a creative day - Jacquie.


No comments:
Post a Comment