Well my Crafty Friends here we are around the corner from December the month for everything Christmas.
Before December starts we need to get our Advent Calendar's ready.
So with Studio 73 and their beautiful "Australian Bush Christmas Collection" and Kaisercraft's Box Advent Calendar I've put them together to create this is beautiful Christmas piece to add to my Christmas decorations.
Kaisercraft have this wonderful flat packed MDF Craftwood box available, making it easy to then decorate it once you put it together.
Once I glued together the main frame I went ahead and painted mine white, you can paint it whatever colour you prefer or leave it in its craftwood look state.
I also glued and painted each little box as well after assembling them.
Once I had that ready I could move onto choosing and working with my paper collection.
I chose the "Jingle Bells" sheet. I cut a 18cm x 13.5cm white piece of paper to lay over my image so I knew where to cut to be able to make the most of the image.
I marked out with pencil so I knew where to cut.
Then, as I didn't want to loose the Kangaroo on the end and cut him in half; I cut around him so I could cut him out and arrange him on the page later.
I cut out a few more Kangaroos from the ABC Fussy Cuts page in the collection.
Once I layered them, you couldn't see the gap where I cut around the Kangaroo originally.
I used foam mounts to layer them to give them dimension.
Originally on the page I cut up to use as a background; Santa was in the sleigh, but as I wanted dimension I altered the image so to speak.
I again cut a Santa and a sleigh from the ABC Fussy Cuts page and first I overlaid the sleigh then placed the Santa in front so It looked as if he was standing outside the sleigh...it all covered up the original picture luckily.
Then I added extra branches along the top and some more cute little animals and the Merry Christmas words and filled the space.
So this is my new image now altered - really you can say I just needed the background to build upon.
I then decided to add some little coloured led lights, which I taped on the back and poked the tiny lights through holes I made behind the images.
Then sandwiched everything by adding some chipboard to make it all sturdier.
Then I had a lit up image.
I then secured my image to the back board and for the battery controller on the lights I made a hole in the back of the advent box and pushed it through out the back so I could turn it on and off.
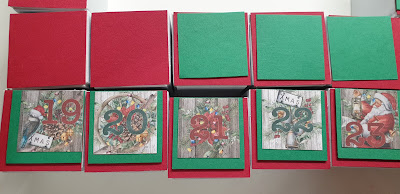
I cut up all my advent numbered images from the 4 x 4 sheet which is on the back of the cover page to the paper collection.
Once I had all my pieces glued I cut 4cm red ribbons and folded in half to add to the fronts of the boxes to be able to pull out box from its housing.
I did this because I was not using the front with the half circle cut out as part of my images would have been cut and I didn't want that.
So it all came together nicely.
I then added a nice Christmassy decoration to match on top.
There you have it.
If you'd like to see it up close, I will pop it in the shop at Craft On The Run and hopefully it will give you some inspiration to make your own.
***********
Thanks again for joining me.
Until next time.
Happy Crafting.
Niki


No comments:
Post a Comment